
To create a new records list, watch this quick video, or follow the directions below:
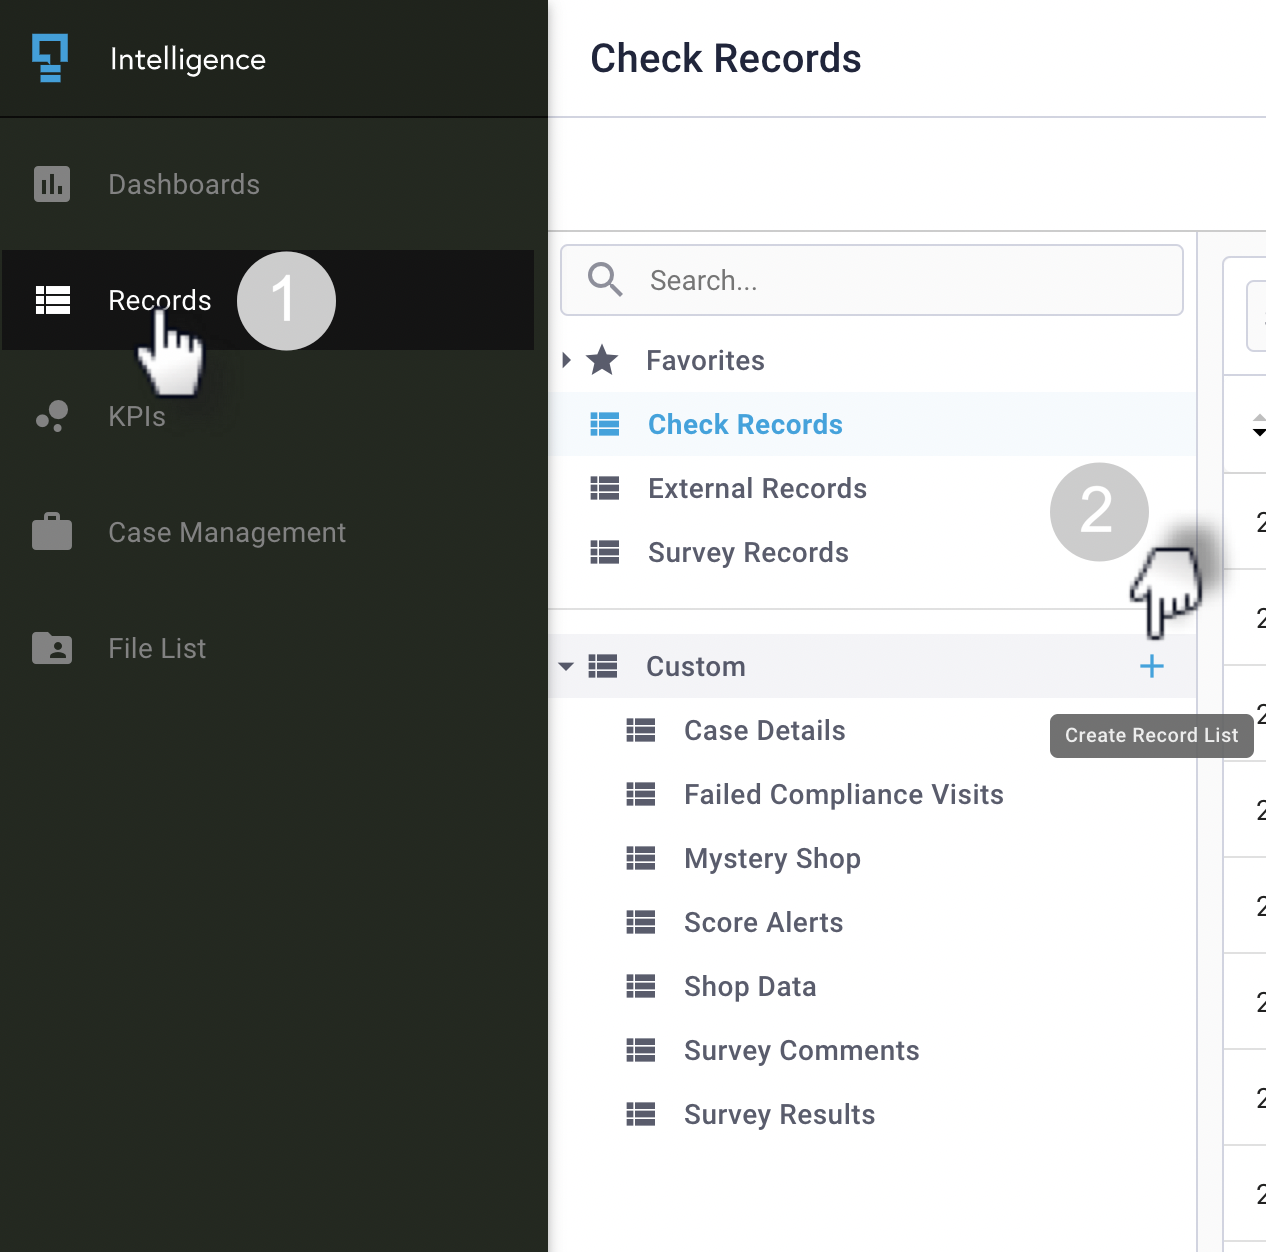
- In the left-side navigation menu, click on Records.
- On the Records menu located on the left - Click on the + button under Custom
-
The Create New Record List box will appear
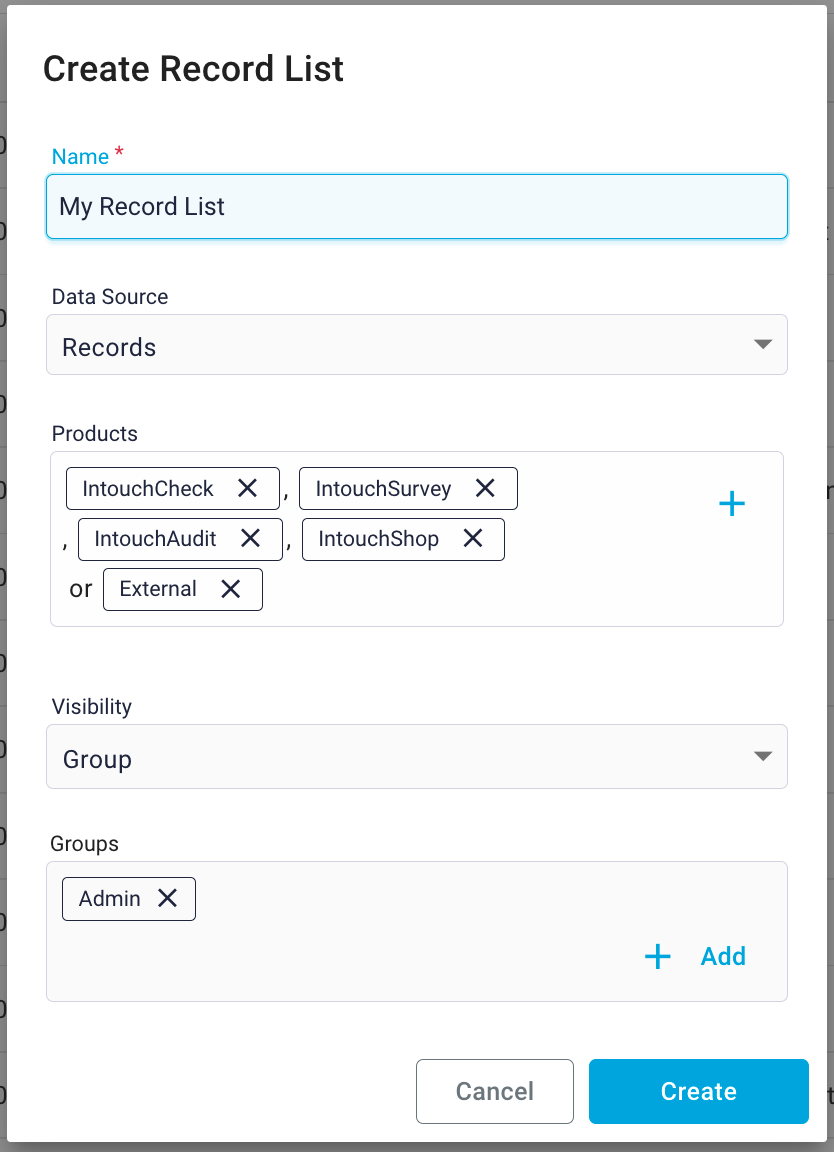
- Enter the record list name - you will want to use a name that describes the record list . For example, you could include the program name. E.g. Merchandising Audit.
- Data source - Select Records, Cases, or Followups
- Products - Select which products data should be included in your list (this can be adjusted later if needed)
- Select the Sharing setting for your record list.
- Private: The record list will only be visible to you
- Public: The record list will be visible to all users across your organization, and can be edited by other Admin users and users with IQ Advanced Settings access
- User: The record list will be visible only to the individual user(s) you select, and can be edited by other Admin users and users with IQ Advanced Settings access, if they have visibility
- Group: The record list will be visible only to the user group(s) you select, and can be edited by other Admin users and users with IQ Advanced Settings access, if they have visibility
- Click on Create.
You will immediately be redirected to the record list editor, where you can configure your record list where you can add columns, apply filters, and adjust the settings of your record list.
The sharing setting can be edited after the record list is created, so you may want to set it to private until you've finished configuring the record list.
Comments
0 comments
Article is closed for comments.